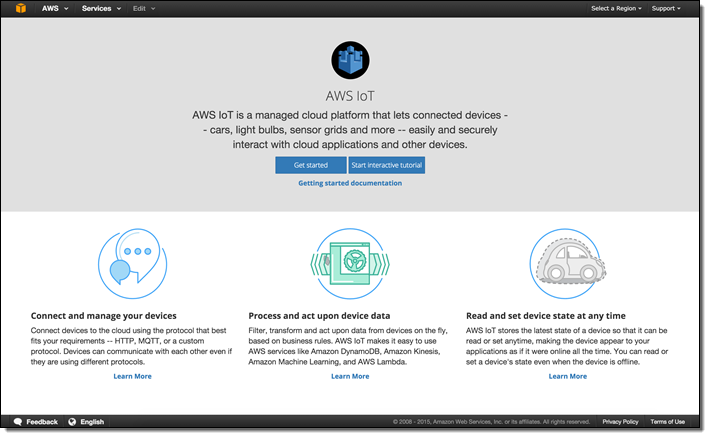
AWS IoT
Yesterday, a new platform for internet of things (IoT), “AWS IoT” is announced at AWS re:Invent 2015. AWS IoT makes it easy for devices to connect to AWS cloud (press release, official blog, official document for developers).
kintone
kintone is a cloud-based DB service without coding, allows managers and employees to collaborate, track project task statuses, view purchase orders, manage time sheets and much more.
– Build Apps – Build applications quickly and easily. No coding required.
– Collaborate – Ideas, teams, and projects come together with kintone.
– Automate – Supercharge your business processes using workflow automation.
Additionally, kintone provides REST API and JavaScript API for developers to build custom integrations, accessing to kintone records and creating one’s own views with JavaScript/CSS.
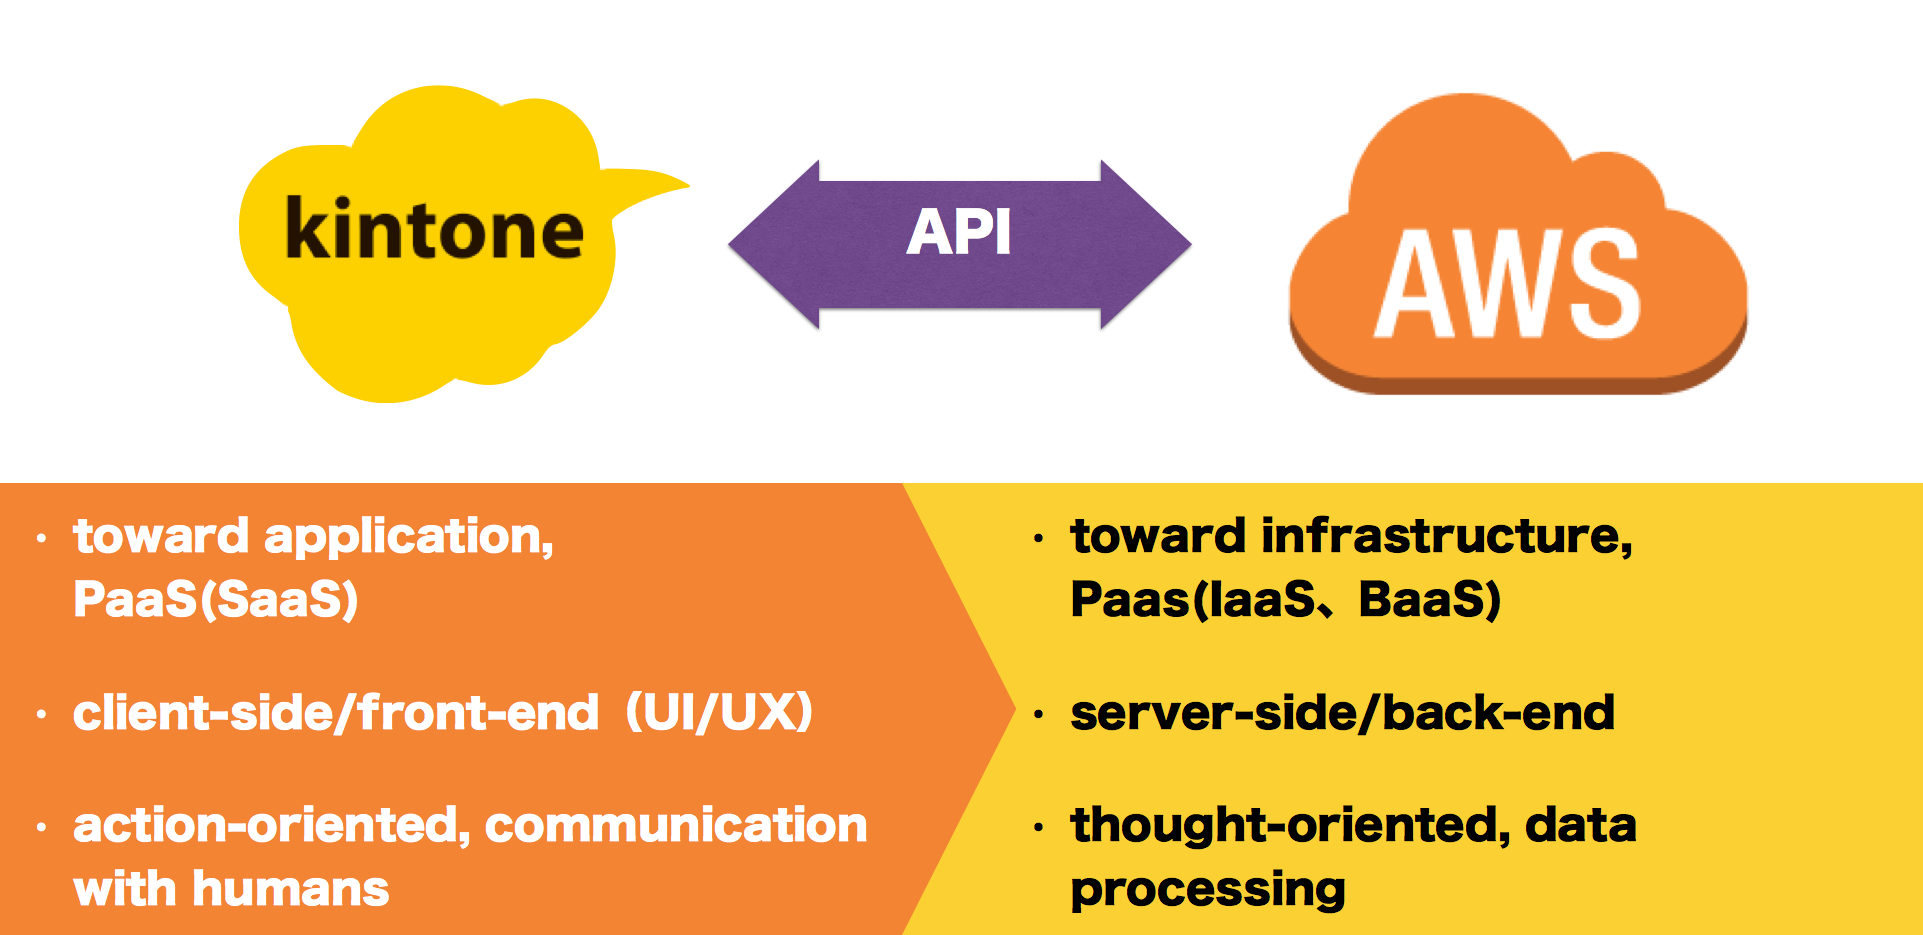
Connectivity of kintone with AWS
kintone and AWS have good connectivities and compatibilites, and complement each other like this.
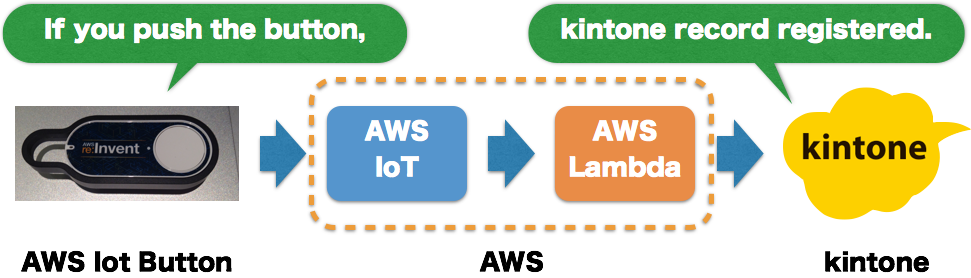
Concept of AWS IoT Button connected to kintone via AWS IoT
In this case, I try a simple connection that if you push “AWS IoT Button”, one record is registered to kintone with AWS IoT, AWS Lambda and kintone REST API.
Configuration of kintone & AWS
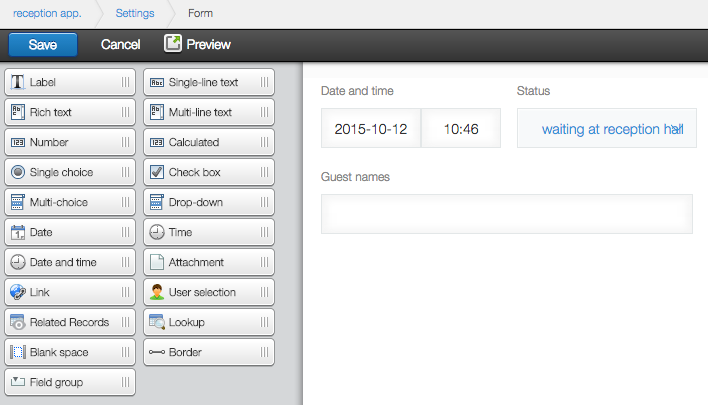
Create a kintone application
create a kintone application consisting of forms like this.
| Example field names(field code) | summary | Field types |
|---|---|---|
| Date and time | Date and time that the button is pushed. | DATETIME |
| Status(reception_status)
|
“waiting at reception hall” is registered when the button is pushed. The meeting assignee changes status to”meeting done” after meeting. | DROP_DOWN(”waiting at reception hall”, “meeting done”) |
| Guest names | The meeting assignee changes types guest names | SINGLE_LINE_TEXT |
Create a Lambda function
You have to replace {kintone domain}, {user id}, {password}, {app. id} with your parameters (see also, kintone REST API, User Authentication, Add record).
/* include modules */
var aws = require('aws-sdk');

var request = require('request'); // HTTPS request library

/* parameters of kintone */
var API_VERSION = '/k/v1/';
var DOMAIN = '{kintone domain}'; // e.g. joyzo-us.kintone.com, joyzo-cn.cybozu.cn, joyzo-others.cybozu.com
var JSON_CONTENT = 'application/json';
var AUTH_VALUE = new Buffer('{user id}:{password}').toString('base64');
var auth_headers = { // for GET request with query and multipart/form-data request
  'X-Cybozu-Authorization': AUTH_VALUE
};
var content_headers = { // for JSON request
  'X-Cybozu-Authorization': AUTH_VALUE,
  'Content-Type': JSON_CONTENT
};

/* Lambda function */
exports.handler = function(event, context) {
  console.log(JSON.stringify(event));

  var app_id = "{app. id}";
  var post_record = {
    "reception_status": {
      "value": "waiting at reception hall"
    }
  };

  simpleRequest('POST', "https://" + DOMAIN + API_VERSION + "record.json", content_headers, {
    app: app_id,
    record: post_record
  }, function(record) {
    console.log(JSON.stringify(record));
  });

};

/* simple kintone REST API function */
function simpleRequest(method, url, headers, body, callback) {
  var config;
  config = {
    method: method,
    url: url,
    headers: headers
  };
  if (url.indexOf('file.json') >= 0 && method === 'POST') {
    console.log("formData REQUEST:");
    config['formData'] = body;
  } else {
    console.log("JSON REQUEST:");
    config['json'] = body;
  }
  return request(config, function(err, response, body) {
    var e, json;
    if (err) {
      callback(err);
    }
    try {
      json = body;
    } catch (_error) {
      e = _error;
      callback(new Error(e, null));
    }
    if (typeof json !== 'object') {
      json = JSON.parse(json);
    }
    return callback(json);
  });
}
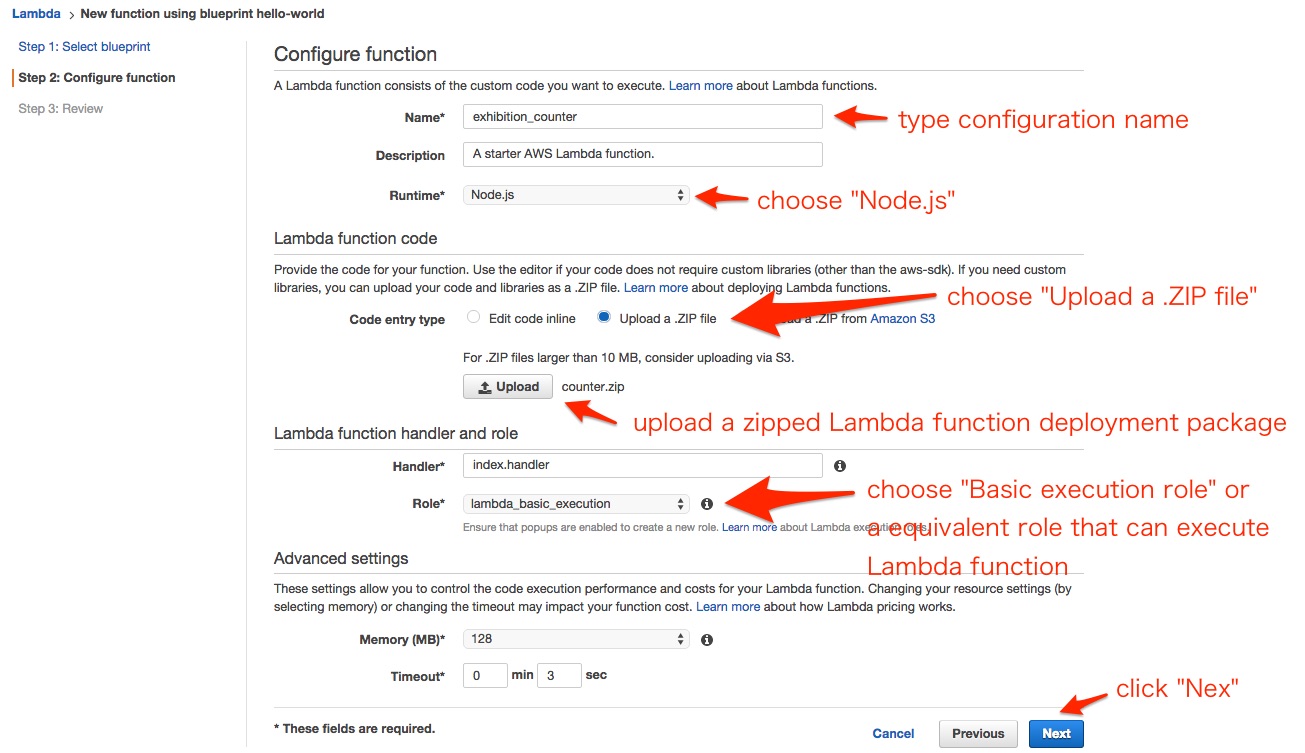
install request library, and create a Lambda function as a deployment package.
npm install request
zip -r counter.zip index.js node_modules/
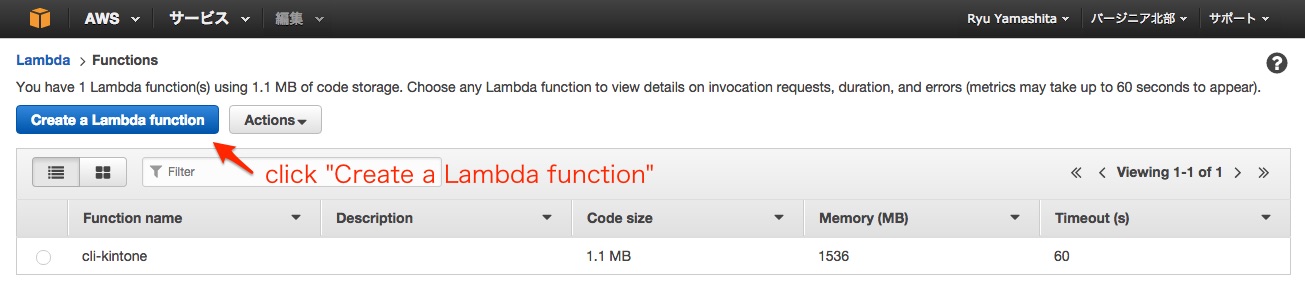
click “Create a Lambda function”.
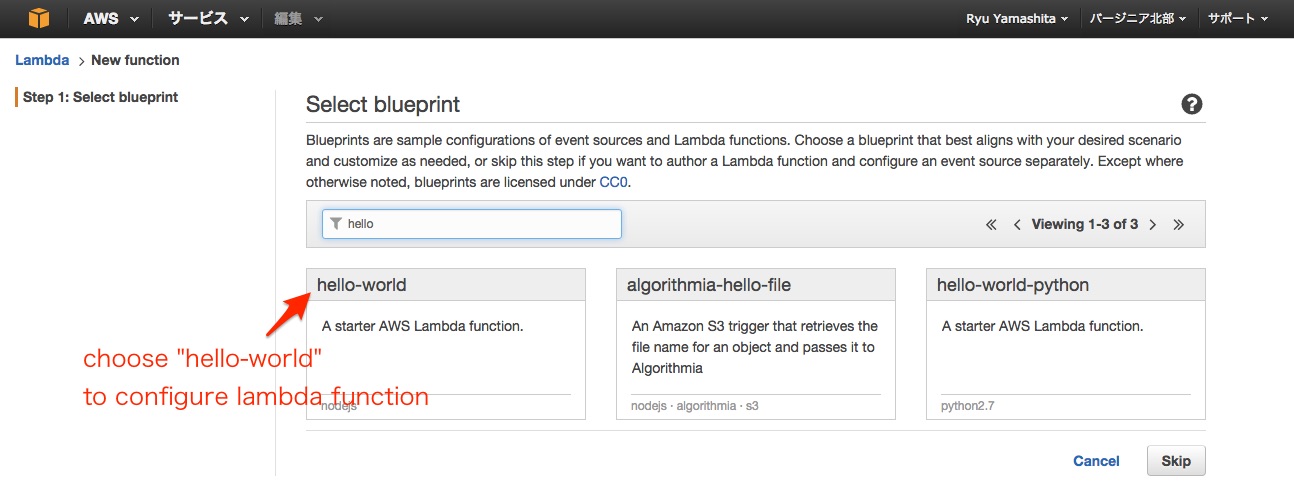
choose “hello-world” to configure a Lambda function.
configure a Lambda function as below.
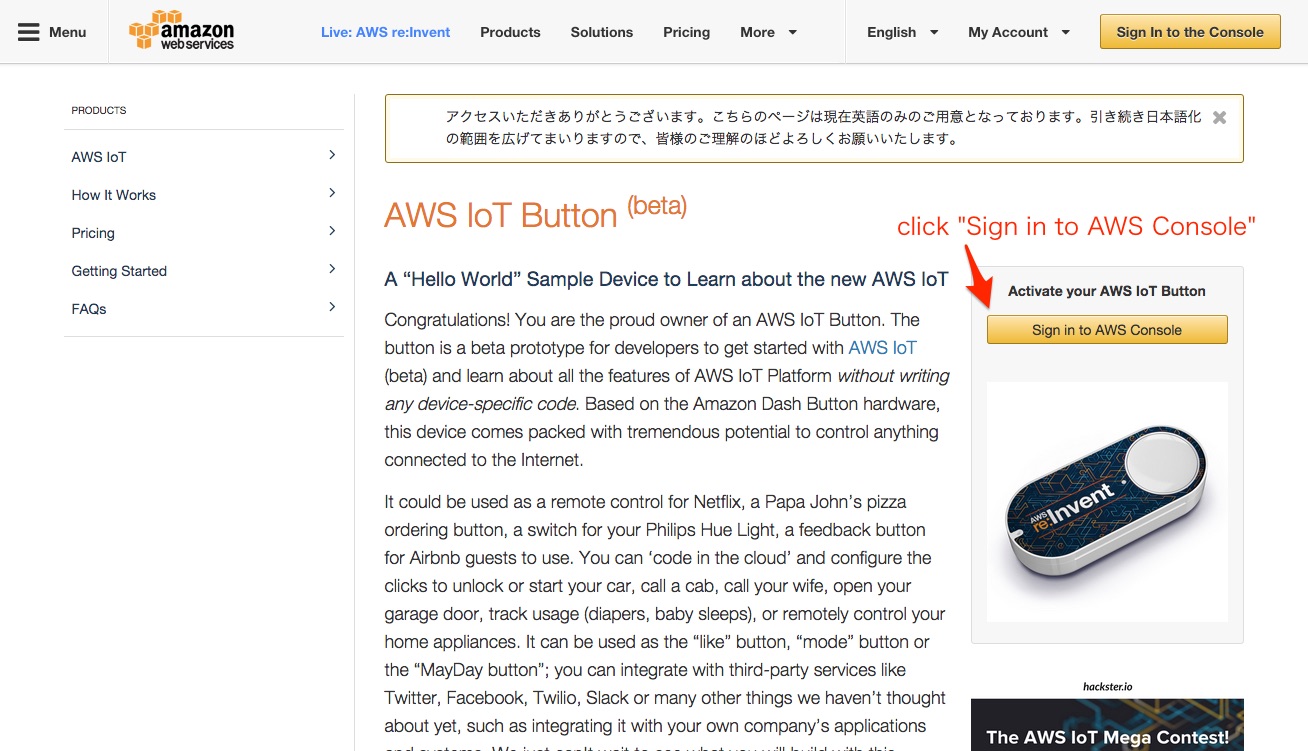
Activate AWS IoT Button
click “Sign in to AWS Console”.
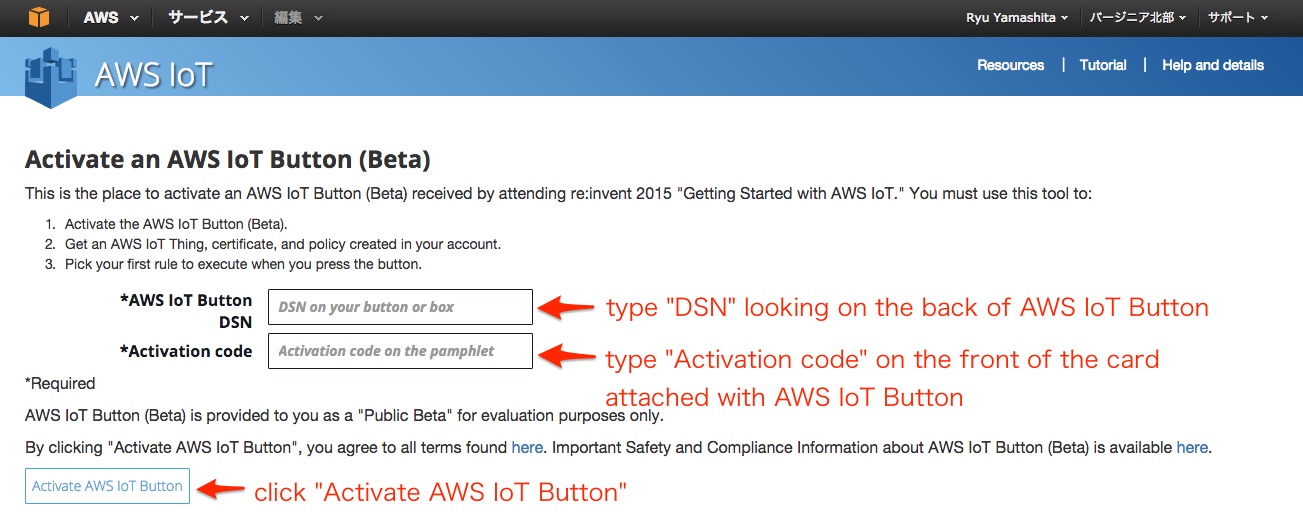
type activation information while looking at AWS IoT Button.
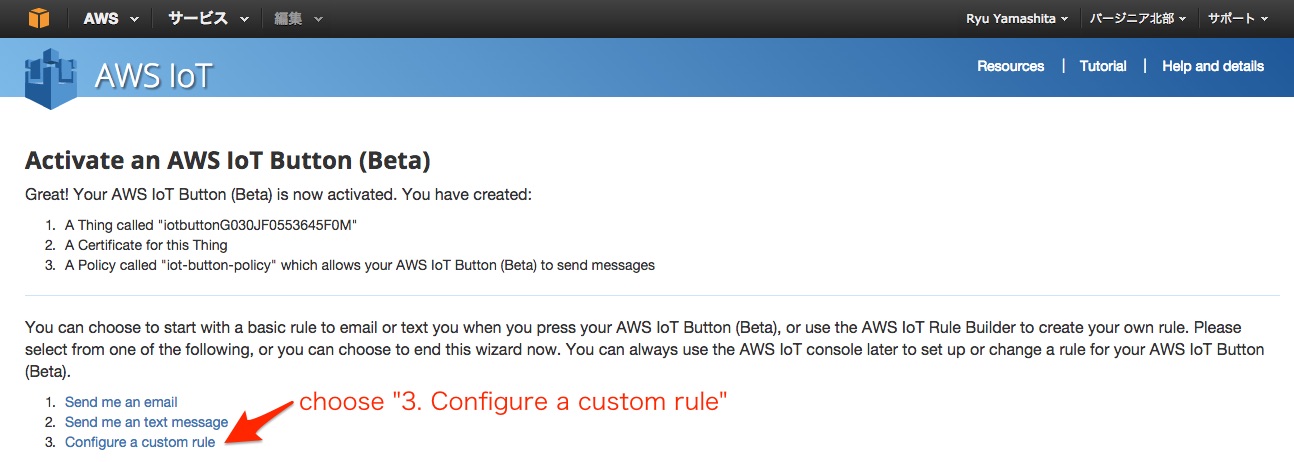
choose “3. Configure a custom rule”.
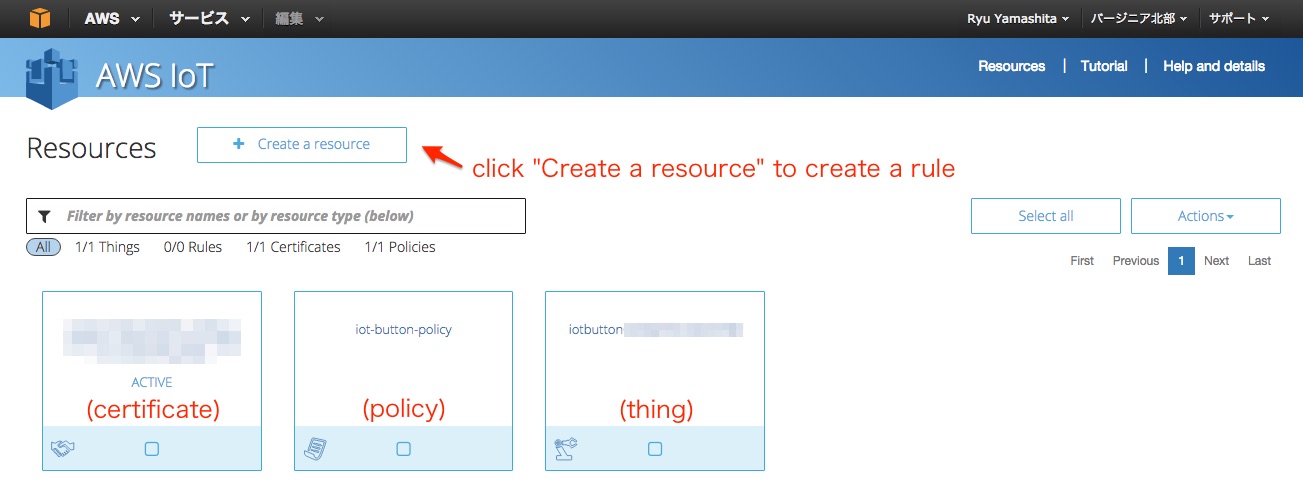
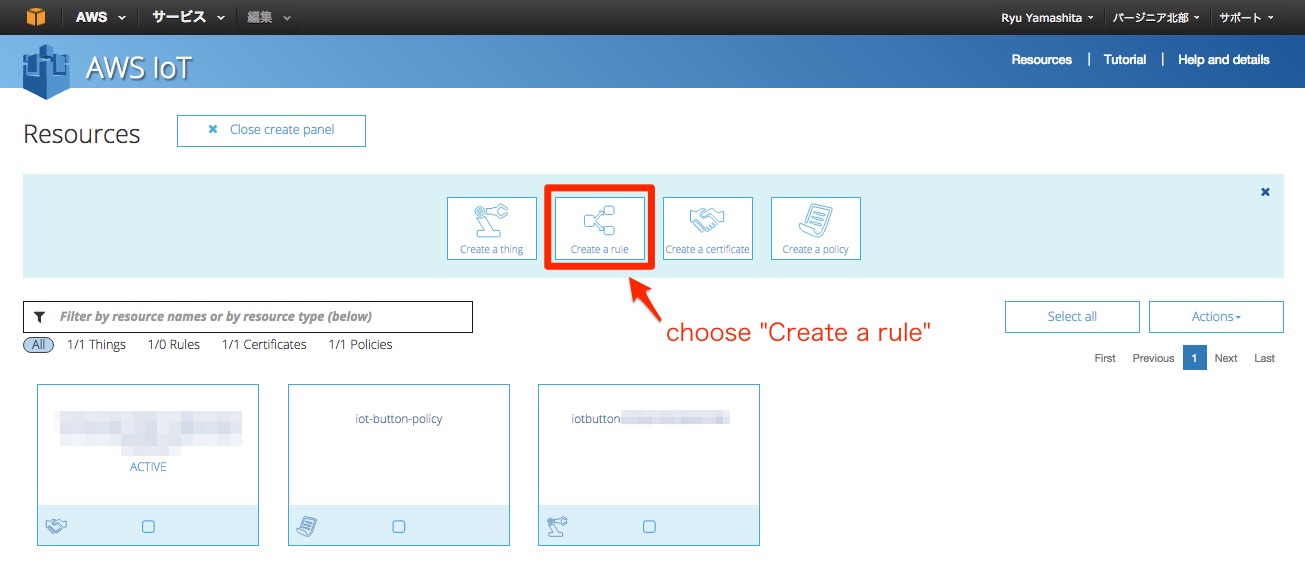
click “Create a resource” to create a rule.
choose “Create a rule”.
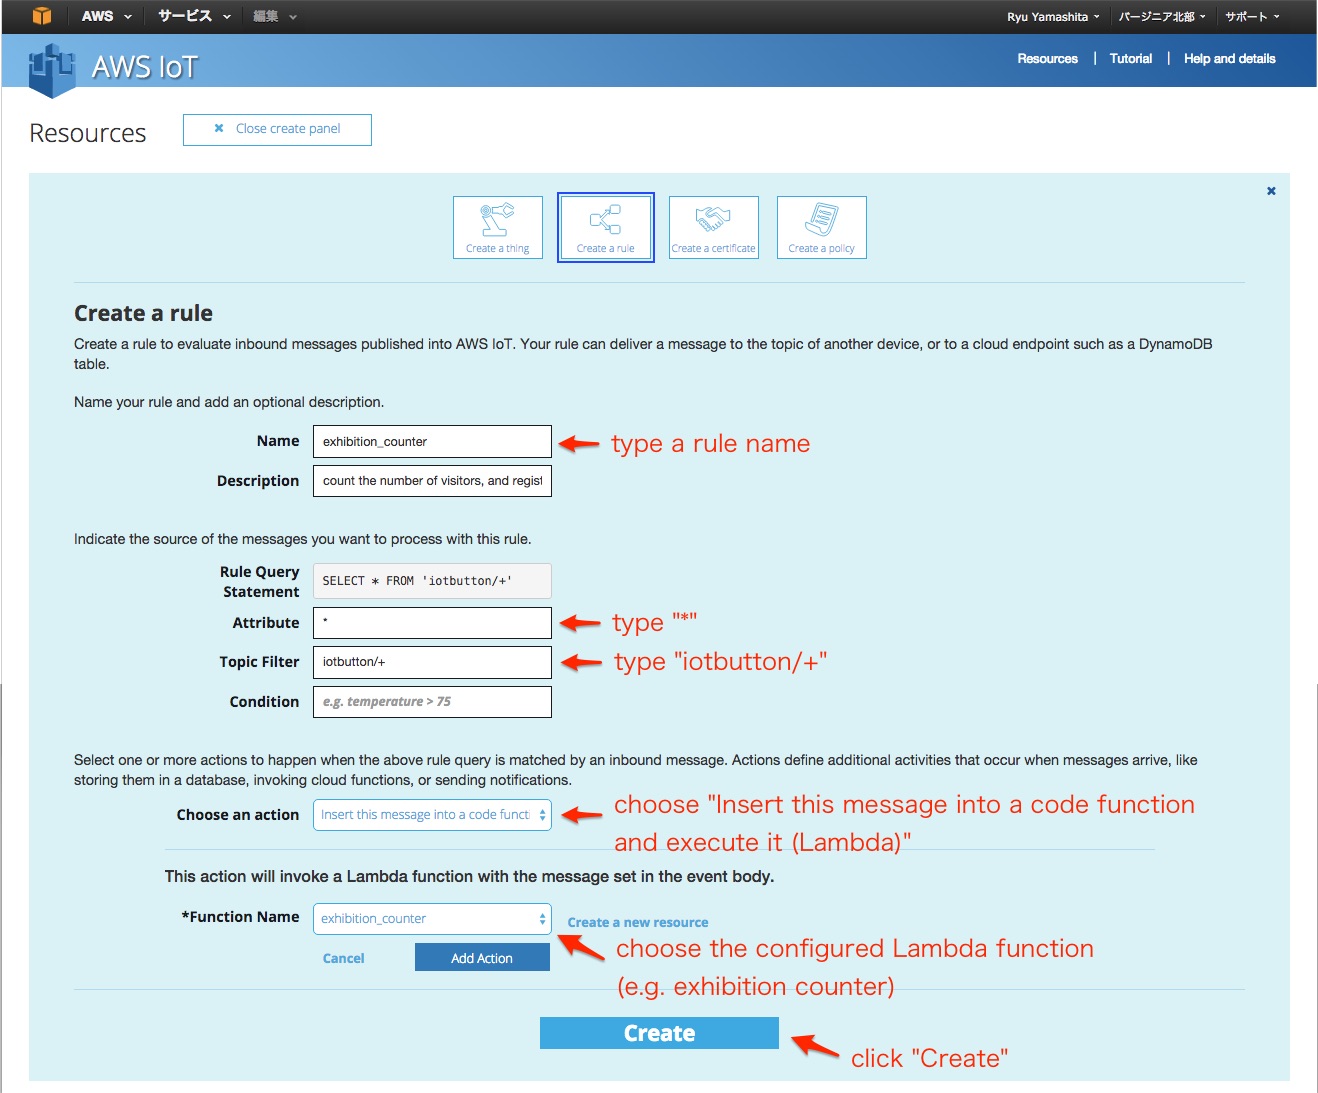
type rule information to create a rule as follows.
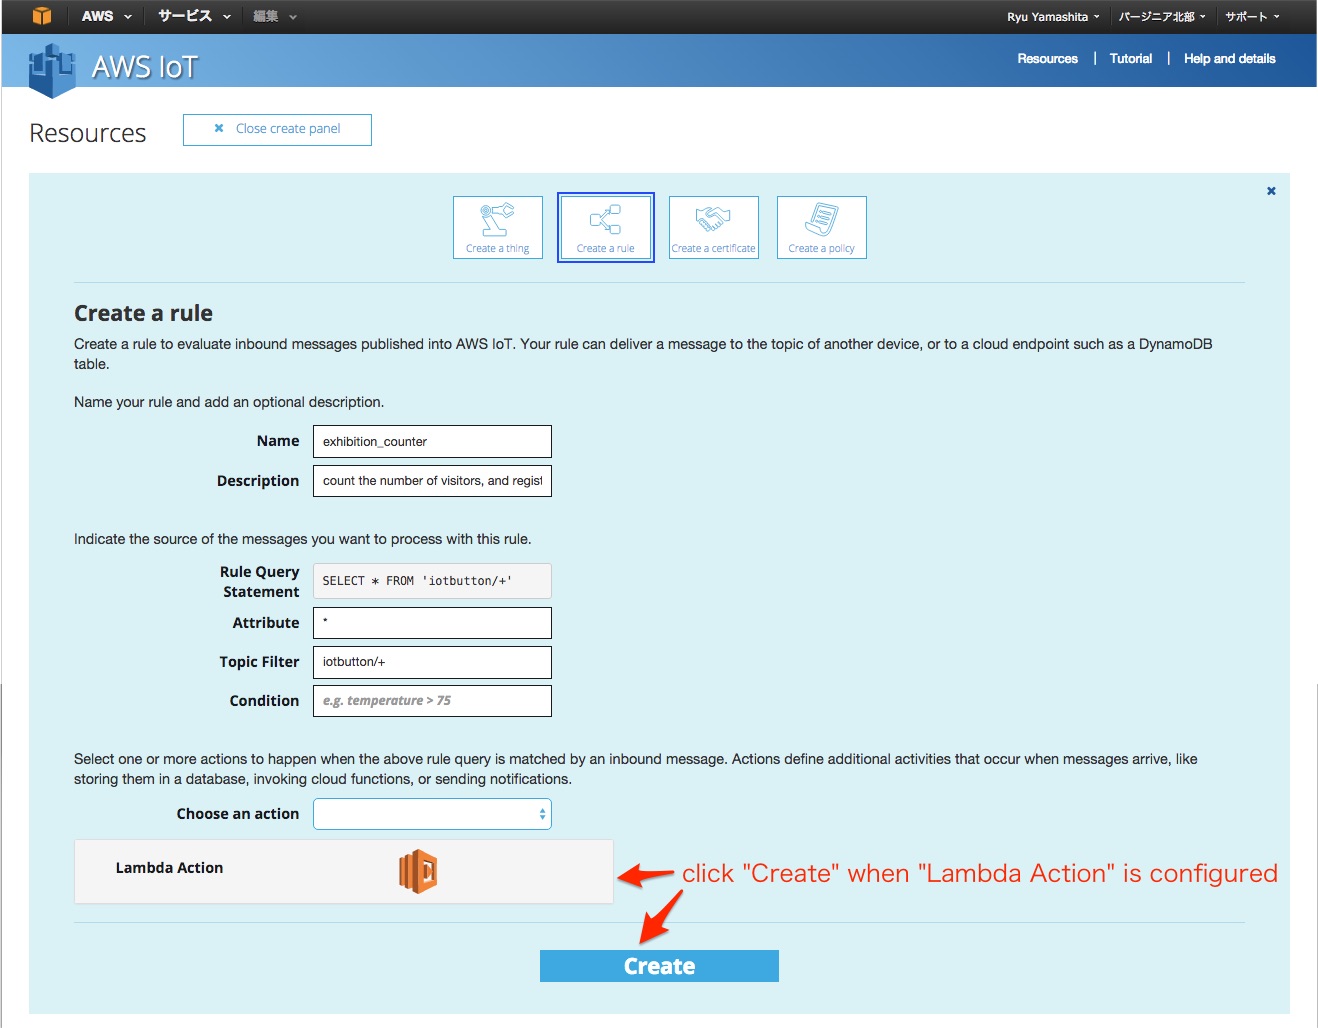
click “Create” when “Lambda Action” is configured.
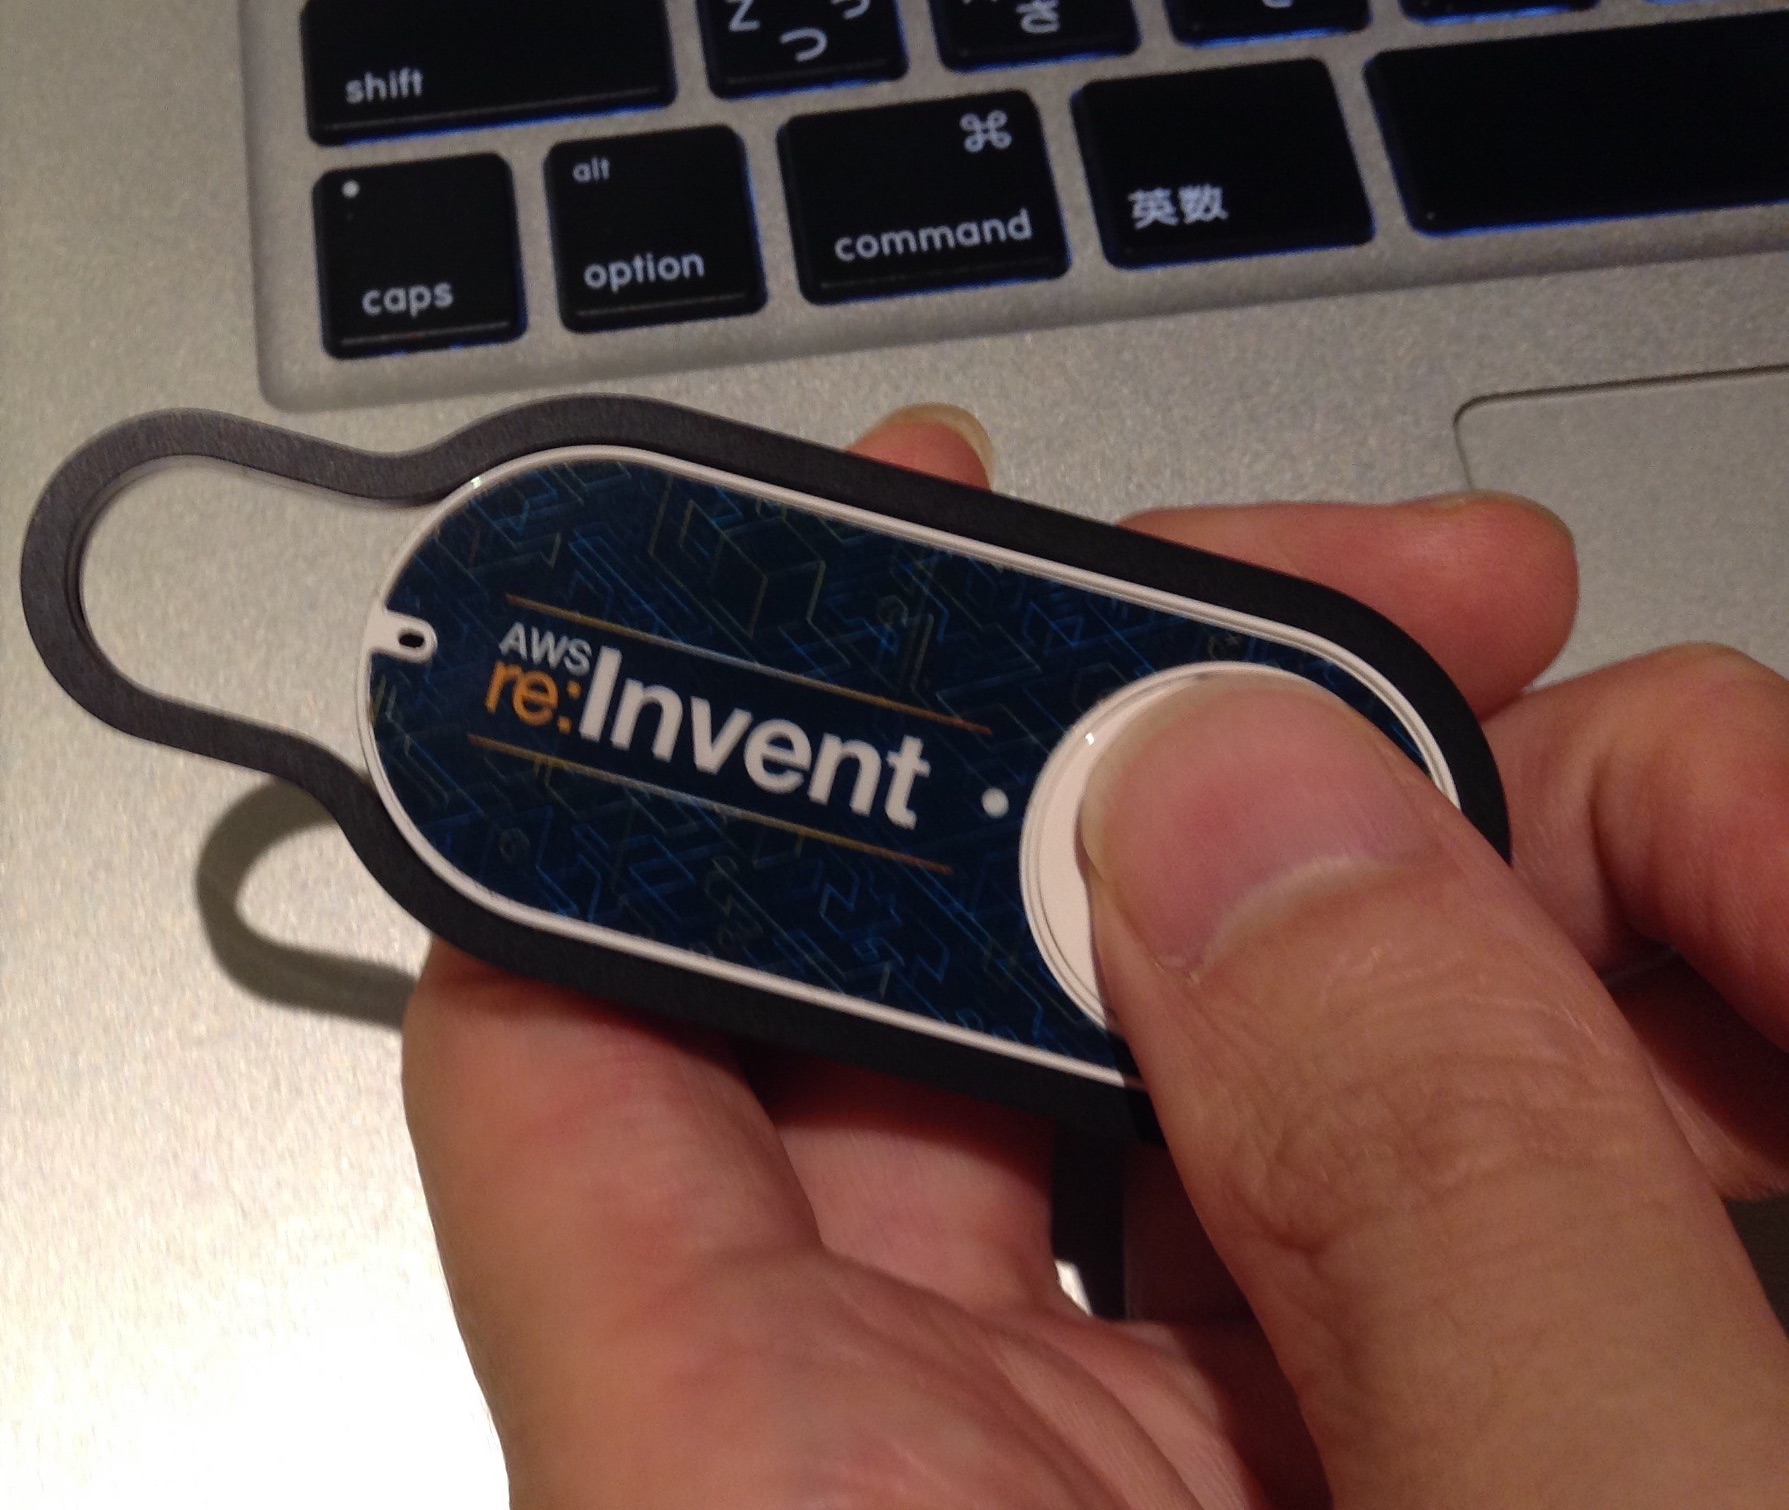
Push the AWS IoT Button, and a kintone record is registered!
All configuration and settings are completed. Please try to push the AWS IoT Button!
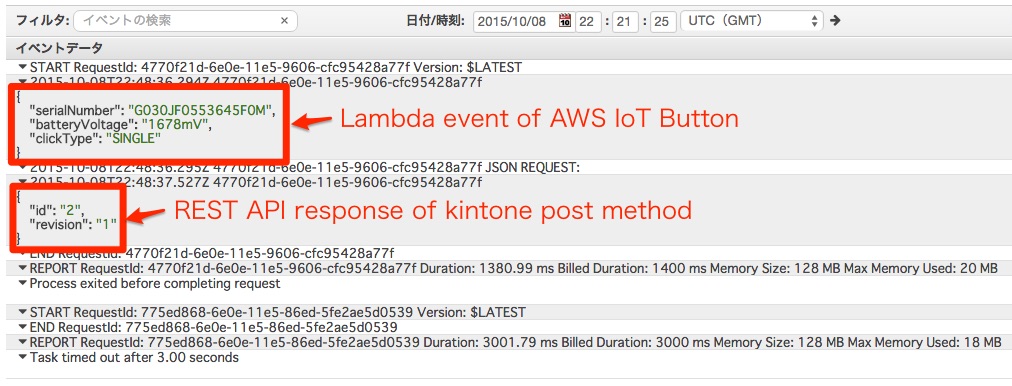
You’ll find a Lambda event of AWS IoT Button and a REST API response of kintone post method in your AWS CloudWatch Logs.
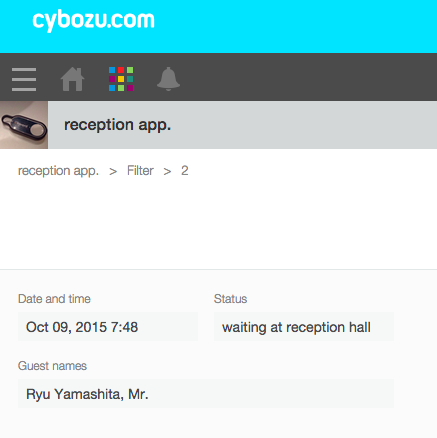
You can also confirm a registered kintone record at kintone app!
Let’s try it ! Thank you.